 Apache NetBeans
Introduction to Groovy
Last reviewed on 2019-01-26
This document gets you started with Groovy in NetBeans IDE. You will create a Java application, add a JFrame, and retrieve a simple message from a Groovy file.
Creating the Application
In this section you will create a new Java application.
-
Choose File > New Project (Ctrl-Shift-N;⌘-Shift-N on Mac) from the main menu to open the New Project wizard.
-
Select Java Application in the Java category. Click Next.
-
Type GroovyJavaDemo as the Project Name and specify the folder where you want to create the application in the Project Location field.
-
Deselect the Create Main Class checkbox. Click Finish.
When you click Finish the IDE creates the project and displays a project node in the Projects window.
Creating the Java Class and the Groovy File
In this section you will create a JFrame and a Groovy class.
-
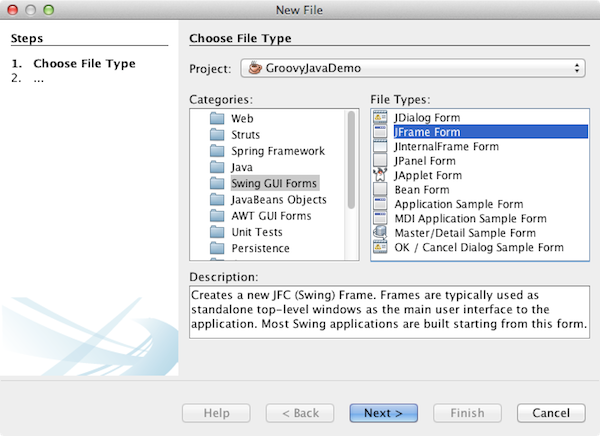
Right-click the project node in the Projects window and choose New > Other to open the New File dialog box.
-
Select JFrame Form in the Swing GUI Forms category. Click Next.
-
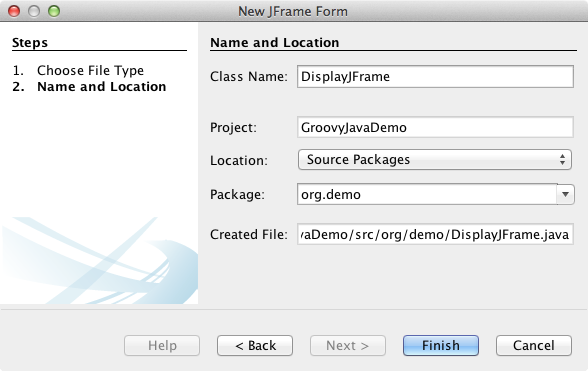
Type DisplayJFrame as the Class Name.
-
Type org.demo as the Package. Click Finish.
When you click Finish the IDE creates the JFrame form and opens the file in the editor.
-
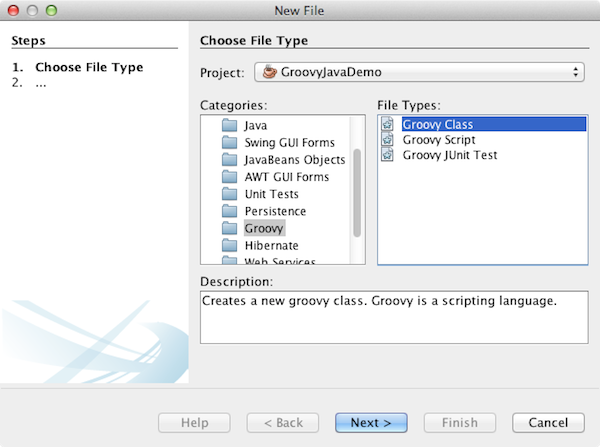
Right-click the project node in the Projects window and choose New > Other to open the New File dialog box.
-
Select Groovy Class in the Groovy category. Click Next.
-
Type GreetingProvider as the Class Name.
-
Select the
org.demopackage from the Package dropdown list. Click Finish.
When you click Finish the IDE creates the Groovy file and opens the file in the editor.
If you expand the project node in the Projects window you can see that the two files that you created are under the Source Packages node.
Calling Groovy from Java
In this section, you will code the interaction between the Groovy file and the Java class.
-
Open
GreetingProvider.groovyin the editor (if not already open). -
Define a greeting variable within the class definition by adding the following code (in bold). Save your changes.
class GreetingProvider {

    def greeting = "Hello from Groovy"

}-
Open
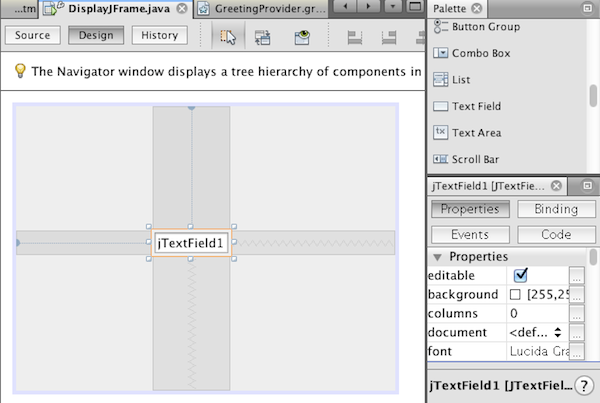
DisplayJFrame.javain the editor (if not already open) and click the Design tab. -
Open the Palette (Window > Palette from the main menu) and drag and drop a Text Field element (
jTextField) from the Palette and into the JFrame.
-
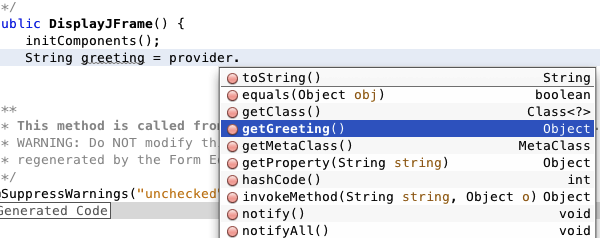
Click the Source tab in the editor and add the following code at the top of the class body to instantiate the Groovy class and in the constructor to call the
getGreeting()method in the Groovy class.
public class DisplayJFrameForm extends javax.swing.JFrame {

    GreetingProvider provider = new GreetingProvider();

    public DisplayJFrame() {
        initComponents();
        String greeting = provider.getGreeting().toString();
        jTextField1.setText(greeting);
    }
You can use code completion in the Java class to find the methods you need in the Groovy class.
| JIRA https://issues.apache.org/jira/browse/NETBEANS-1996 has to be solved for the Java editor to recognize the Groovy reference and for code completion shown above to work. Despite that, and even though the Java editor shows the Groovy reference with a red underline, you can still follow the step below and successfully run the application. |
-
Right-click the project node in the Projects window and choose Run.
When you choose Run, the IDE compiles and launches the application.
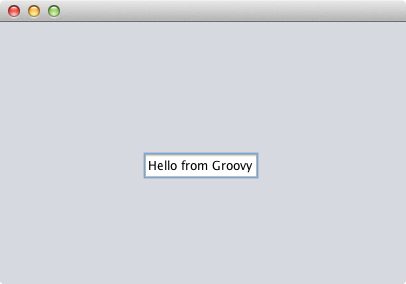
In the window of the application you can see that the text from the Groovy class is displayed in the text field.
You now know how to create a basic Java application that interacts with Groovy.
